Using Sun Dried Tomatoes

Reconstituting Sun Dried Tomatoes

Sun Dried tomatoes in a salad.

Method 2 Sun dried tomatoes in a salad. (the jar method)

OK so you have lots of sun dried tomatoes but they are useless unless you know what to do with them. The obvious thing to do is to add them to stews and anything you are cooking. In this post I want to tell you how to reconstitute them so that they can be used in salads etc as a substitute for fresh tomatoes in the months that fresh tomatoes are not available.

Method 1
Put some tomatoes on a deep plate.  Cover them with boiling water. Cover with an upturned plate. Leave for 15 minutes or until they are soft. Pour off the water. Sprinkle on some salt and drizzle some olive oil over them. They can be served as a tomato salad just on their own.  As you can see some of the sun dried tomatoes can go a bit black but they taste the same so I don’t care. 

Sun Dried Tomatoes in a salad

Method 1 Sun Dried Tomatoes in a salad

Method 2
Cram some dried tomatoes into a glass jar. Add a small teaspoonful of sugar to the jar. Fill the jar up with a mixture of water and vinegar. The ratio is according to taste and how strong the vinegar is. Leave for 24 hours. Use within 3 days because they will start to ferment. I tend to use these tomatoes as a substitute for fresh tomatoes in winter salads. 

The tomatoes on this page were dried in my solar drier. Click here to see it

How to plant seeds in a flower pot

How to plant seeds in a flower pot

Planting seeds in pots

Planting seeds in pots

There are 3 main ways of sowing seeds:

  1. Sowing directly into the soil where they will grow.
  2. Sowing them into modules
  3. Sowing them into flowerpots. (or other containers) 

Here we are going to talk about sowing seeds in plant pots, flower pots or containers.

Here are some of the advantages of using pots:

 1. No weeds: You can be certain that the only seeds in the soil are the ones that you want to grow so there is no weeding or competition from weeds. 

2. Portability: Pots are portable and they can be moved around. For example moved into warmer or sunnier places or moved away from the cold if necessary. It is good for young seedlings  to have some air movement to strengthen the stems and also to have some direct sunlight. Plants tend to lean over to face where the light is coming from so you can move them around if light is coming from a narrow source.

3. Preparation: The purpose of growing seeds in pots is to raise small vigorous healthy plants.  When they are eventually planted into their final growing place as healthy robust plants all weeds can be destroyed at the moment of planting. If a mulch is applied immediately after planting our plants will have no competition and very little weeding will be necessary.

Which seeds are not suited to being sown in a flowerpot? 

I don’t plant very big seeds such as broad beans in pots. Some plants hate being transplanted so it is best to sow them where they will grow. Examples of these are root crops such as  carrots and parsnips. However if seedlings are handled very carefully they can be planted in pots. Radishes germinate very quickly and are very vigorous so it is best to plant them in the field. 

What type of soil should be used in the pot? 

The most important part of the soil in the pot is the first 3 cm. I fill up the flower pot with any old garden soil to within about 10cm from the top of the pot. Then I use some commercial potting compost soil from a  garden center to within 1.5cm from the top.  The soil right at the top should be fairly fine without any big lumps and it must be totally sterile. You can make your own seed compost for this purpose by putting some soil in a microwave or heating it up in a pan and then passing it through a sieve.  I tend to buy specialized seed compost from the garden center if they have any.

How to sow the seed? 

The most important factor is the depth that you put the seed. Very small seeds tend to  to be left on the surface and bigger seeds are planted deeper.   It often tells you on a seed packet the depth they should be planted. Some seeds need light to germinate whereas others will germinate in the dark.  Many people say that you should sow the seeds on the surface then cover them with other soil to the recommended depth. I tend to put the seeds on the surface and then mix them in with the end of a pencil so that most of them are more or less the correct depth. 

How long does germination take? 

Normally between 7 days and 3 weeks. The time is very dependent on temperature. Plants that need high temperatures to grow like pepper and aubergines like a high temperature say 20C. Cold tolerant plants such as cabbages will germinate at 8C.  The rate of germination depends on how old the seeds are.  In time the germination rate of a batch of seeds goes down until eventually they are all sterile. Below is a viability chart for common seeds.

  • 1 year: onions, parsnips, parsley, salsify, and spinach
  • 2 years: sweetcorn, peas, beans, chives, okra, dandelion
  • 3 years: carrots, leeks, asparagus, turnips
  • 4 years: peppers, chard, pumpkins, squash, watermelons, basil, artichokes
  • 5 years: most brassicas, beets, tomatoes, aubergine, cucumbers, celery, celeriac, lettuce, endive, chicory

What are common mistakes when planting seeds?
If you look at the pictures of novice gardeners on facebook, the biggest mistake is letting the seedlings go leggy.  Being leggy means having a very long thin stem. This is caused by having insufficient light and maybe being too warm.  A 10cm long seedling with a tiny thin stem and 2 small leaves at the top will most likely die very soon.  As soon as  seeds germinate they need lots of light and if they have been put in a high temperature to germinate they should be put in a cooler place. Seedlings grow stronger if they have some air movement which will make them sway around and strengthen the stems.  People growing plants inside in artificial lights use rotating fans.

The most common problem with seedlings is damping off. This is when the seedlings start to die and rot for no particular reason.  It is caused by  fungus or mould that thrives in cool, wet conditions.   If you have this problem, use sterilized pots or trays with good drainage and use clean new potting soil to prevent damping off. Pots can be sterilized with bleach and soil can be heated in a microwave  or a pot. To get complete sterilization,  you should heat the soil to between 80 and 90C for 30 minutes.  By the way, heated soil smells terrible. 

What to do with the seedlings? 
You have to wait until the seedlings are big enough to be transplanted. Generally speaking, seedlings should be more than 3 centimetres high. Seedlings can be either planted into small pots or modules or planted into the ground. 

Inverna Winter lettuce

Inverna Winter lettuce

The image above is of winter lettuce. It has actually been in the pot for some time. I have already potted up many seedlings from this pot into modules. These seedlings are big enough to be planted into the ground or into little pots. I would normally transplant the seedlings when they are smaller than they are in the photo.  In the background of the photo, you can see plastic modules. Seedlings can be planted into modules to let them get established.
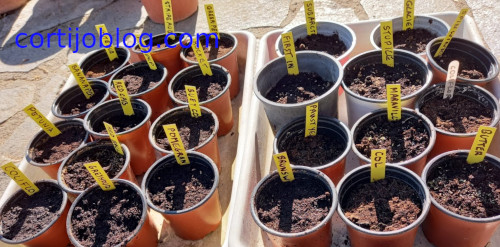
Labels
Don’t forget to label your pots very clearly. You will need a permanent marker. Garden centres sell labels with a special pencil which will not become illegible.  In the past I have made home made  labels out of recycled  plastic bottles.  

How to transplant seedlings?
The only tools I use for this job is my index finger or if the seedlings are small I use a pencil. First I plunge my finger or a knife into the pot  to bring up a clump of seedlings. Then a seedling is pulled away from the clump. I only touch the seedling by the end of one of the leaves.  A hole is made in the place where the seedling is to be planted with a pencil or a finger and the root is lowered in. Afterwards, the soil is very gently  firmed down, then the seedling is watered in with some water from a cup or given a squirt from a spray. The seedling should not be lying down on the soil. The leaves should be in the air. They will take 2 or 3 days to get established. Some of them may die. In that case, just transplant another one from the mother pot.  This is a very pleasant activity on a sunny day. Make sure you listen to music while doing this activity. I find reggae is very suitable. 

Luke Jayne and Ditte transplanting seedlings

Other Comments
The soil that seeds are planted in does not  need any fertilizer. Once the seedlings have been transplanted, they benefit from some nutrients. They seem to like dilute shit tea. Just put some manure in a  bucket of water to soak for a while.  Dilute it with some water and pour over the plants. 

Maravilla Lettuce

Maravilla Lettuce

The image above shows the final product. These lettuce have been recently transplanted from modules. They will quickly expand and completely cover the soil. No weeds will be able to grow. 

Stupice Tomatoes

Stupice Tomatoes

Stupice Tomato

Stupice Tomato

Stupice are one of my favourite tomatoes and possible the most favourite.  I originally bought the seeds several years ago when I was trying to find cold resistant heirloom varieties. I bought several packets of cold tolerant seeds such as “First in the Field” “Arctic” etc but Stupice were the ones that I most liked. There are several reasons why I am a stupice tomato aficionado which I will list below.

Taste: The taste is perfect with just the right contrast  of sweet and acid flavours.

Size:
They are gold ball sized which means that they don’t take ages to pick and process like cherry tomatoes. 

Productivity: They are very prolific and produce vines of several tomatoes.

More Information: Stupice tomatoes originally came from the Czech Republic. I pronounce Stupice as “STEW PIS” but it should be “STU PEACH KA” or “STOO PEET SAY”. Stupice is  naturally disease resistant and tends to suffer less from blight than other tomatoes planted next to it.  It is compact indeterminate (vine) type with potato leaves. The golf ball sized tomatoes  grow in clusters.  They matures in 60-65 days.  They are said to be cold tolerant. 

Bowl of Stupice Tomatoes

Bowl of Stupice Tomatoes

One of the best ways to use these tomatoes is to make a tomato salad. Just cut them into chunks. Add a sprinkle of salt and a good glug of extra virgin olive oil. Wait 20 minutes for the salt to pull out some of the juices and you have a dish fit for heaven. 

You can buy stupice tomatoes here

Picking and Cooking Sweetcorn

A corncob

Success with growing Sweetcorn
2020 has been a very good year for sweetcorn. It is now mid September and we have been eating fresh sweetcorn regularly since the start of July and we should be eating fresh sweetcorn until at least mid October.

How to grow sweetcorn.
It is now possible to buy super sweet varieties of Sweetcorn seeds at any seed shop. I plant my seeds in a big flower pot or just any container which has soil at least 10cm deep. I put the seeds about 1cm down and about 5 centimeters apart.  I plant them out when the little plants are  about 12 cm high. Sweetcorn does not like the cold so it is best if the average temperature is over 14C when they are planted out. I doubt if they would survive a frost.

This year I made extra effort to fertilize them well using only organic fertilizer. Under each plant I have put a 3 double hand fulls of cow manure and one double handful of chicken manure. I prepared the ground using a small fork. Once they started growing well I put a thick mulch of leaves to suppress the weeds. Sweetcorn grows best in a group of plants rather than a line  so I have planted rectangular groups of about 20 plants.

To be able to harvest sweetcorn over a long periods of time I grow 3 or 4 patches. When one clump of sweetcorn gets well established I plant some more seeds. This year, eating sweetcorn every couple of days for months on end has been heavenly.

When to pick sweetcorn.
Each sweetcorn plant grows 2 or 3 corncobs.  People say that you should  open up a corncob and push your thumbnail into into a kernel. If you see a milky liquid it means they are ready. What happens if they are not ready? You have just ruined a corncob. The best indicator of being ready is when the beards go brown. Each corncob has a lot of strands coming out of the end they eventually turn brown. When almost all of the beard is brown they are ready.

How to cook sweetcorn.
The big problem with sweetcorn is that the fibrous kernels get stuck in your teeth. This problem gets worse as you get older because as you get older there are more gaps in between your teeth. This year we seem to have solved this problem. Either after cooking or before we cut the corncobs into bite sized pieces. The incisors at the front of your mouth cut the kernels of  the corncob without getting stuck in your teeth.

To cook sweetcorn put it in cold water, bring to the boil, simmer for between 10 and 15 minutes. Leave in a water for 5 minutes. We are at 1300 metres high here so water boils at 95C, your cooking time might be less. 

How to store sweetcorn.
If you don’t manage to eat all your sweetcorn fresh then you can leave it to go dry. Just pick the corncobs, take off the outer coverings and put them in a dry airy place. The best way to use dried corn kernels is to make sweetcorn fritters or maize fritters. There are loads of recipes on internet. The other way to store them is by canning/bottling them and the result is the same as canned sweetcorn that you buy in the supermarket. You will need a pressure cooker to get the temperature very high because sweetcorn does not have much natural acid. There are lots of instructional videos on internet.

Sweetcorn cut into pieces

Here is a video of one of our sweetcorn patches.

Is our olive oil organic?

Nonnie Picking Olives

Nonnie Picking Olives

For people who can’t be bothered to read this page.  Just read this one line.
Is your olive oil organic? Yes, it is probably the most organic oil you will ever taste.

Why  our olive oil is not officially organic.

Products which are organic generally have a higher price because being organic has higher costs. We decided it would be a good idea to get organic certification so that we could sell our olive oil at a higher price. We paid our 160 euros for the first year to the certification entity. Around 5 months later the man who came to inspect the land came to visit us in a big gas guzzling Land Rover. He said it was not necessary to even look over our land. He said that he would never come unexpectedly to our farm, he would never jump over the fence to take a soil sample. He could give no advice about organic fertilizers and where to obtain certifies organic fertilizer. Basically as long I as I keep paying the fees I will get organic certification. 
To me this is a system open to fraud and the organic certification does not certify anything. If you buy organic produce you just have to trust the producer.  For this reason I gave up the idea of becoming certified as officially organic.

Why  our olive oil is actually organic

Our olive oil is actually super organic we are vastly more organic than most organic olive oil. Here are the reasons why: 

Non mechanical  picking. 

We pick olives by hand  there are no noisy petrol driven picking machines. 

Organic Fertilizers. 
We only use organically certified fertilizers based on animal manure. 

No Pesticides. 
We do not use any pesticide whatsoever.

Bee friendly meadow system. 
We don’t plough around the trees. In the spring the olive grove is ablaze with wild flowers which attract bees and butterflies and many insects. We do not use any weedkiller. 

No burning of prunings  

From time to time you may have to put up with a neighbour burning tree branches after fruit trees are pruned. This releases Co2 into the atmosphere and the smoke is a pollutant. Here we use a wood chipper which creates several tons of mulching material which we use on the vegetable garden.  Most of the carbon is incorporated into the soil. In addition to saving water, improving soil, combating pests and stopping weeds, wood mulch actually reduces the release of a nitrous oxide which is a  greenhouse gas 300 times more potent than carbon dioxide.
Several website explain the many advantages of mulching: Link 1 Link 2