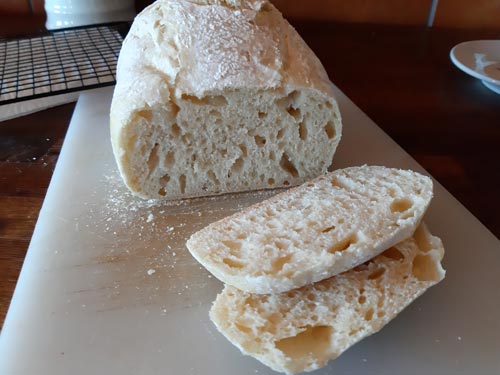
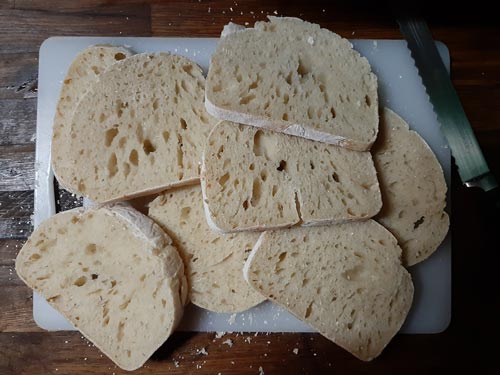
My Sourdough Bread

Like many people, I started making my own sourdough in the COVID lockdown and it has been a learning experience. This is my tried and tested recipe and method for 50% brown flour/50% strong white flour loaf.

INGREDIENTS

  1. 250g strong white flour
  2. 250g brown bread flour
  3. 320g warm water
  4. 15g salt

EQUIPMENT

  • a hand blender or food processor with dough hook
  • a large stainless steel bowl
  • a spatula
  • a plastic bowl with a lid (for mixing the starter)
  • a loaf tin (this is one I buy from Amazon)

AUTOLYSE

In order to strengthen the gluten in the brown flour, I mix the flour, water and salt beforehand. This is called AUTOLYSING and it softens whole wheat flour and produces a better texture loaf. You are not supposed to add the salt at this stage but I kept forgetting it the next day so I now chuck that in too.

STARTER

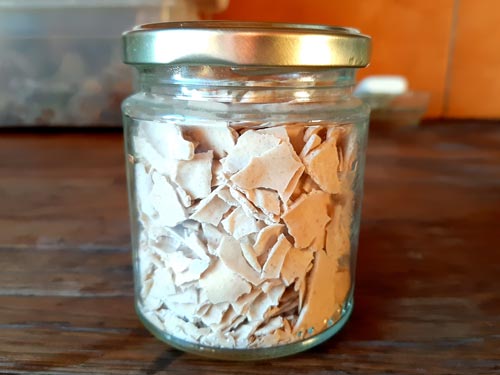
Your starter is the most important thing in sourdough breadmaking. I keep mine in a small WECK jar with a wooden lid on the top shelf of the fridge, right at the back, so that no one will take it out to get to something and leave it out. It’s a good idea to have a loose-fitting lid but found that I kept breaking the original glass lids that came with the WECK jar:

3 tapas de madera Weck medianas, bonitas tapas de madera de haya. Tamaño mediano = 80 mm. Compra especial. Solo para adaptarse a tarros WECK.

FEEDING THE STARTER

I only feed my starter when I make bread. It is perfectly happy left in the fridge until then, and there is no problem if you go away for a couple of weeks. It might be a bit sluggish the first few times you use it, but it will soon pick up.

METHOD  

PREVIOUS AFTERNOON:
Take your starter out of the fridge and leave it on the counter.

PREVIOUS EVENING:
MIX THE STARTER:

I always keep back 63g of starter. When I want to make bread, I transfer it to the plastic bowl and mix it together with 63g of organic white rye flour and 63g of warm water. I then put 63g of the mixture in a clean jar and put this back in the fridge. The remaining 125g of starter mix is then covered and left overnight somewhere not too cold.

AUTOLYSE THE FLOURS:
In your large stainless steel bowl, use a hand blender or food processor to mix together the white flour (250g), the brown flour (250g), the water (320g) and the salt (15g). Cover the bowl with a large plate and leave overnight. 

BREAD-MAKING DAY
07:00: MIX FLOUR AND STARTER

I mix together the flour mixture and the starter using a hand blender or food processor.
My method for this is to spread the flour mixture as thin as possible up the sides of the bowl using the spatula. I then add the starter to the middle and fold over the sides to completely cover the starter. I then combine it thoroughly using the mixer. This is then left covered for 60 minutes.

08:00: 4 STRETCHES + 4 STRETCH&FOLDS
I first stretch the dough four times. You are basically pulling it apart between your hands. You then do four stretch and folds. Rather than explaining how to do this, it is probably easier to show you what I mean by this, so here is a video:
https://www.youtube.com/watch?v=eFaKId5ijNg

You then repeat the stretch and folds four more times every 30 minutes:

08:30 STRETCH&FOLD 1

09:00 STRETCH&FOLD 2

09:30 STRETCH&FOLD 3

10:00 STRETCH&FOLD 4

10:00 PROVING THE BREAD – 3 HOURS
Once you have finished all the stretch and folds, you prove the bread for 3 hours. For this, I place the bread in the loaf tin and put it in a warm place with a cloth over it.

Fortunately, I have a bread rising setting on the oven which keeps it at 40ºC. You should not use any higher temperature as this will start to cook the bread. 

In order to stop the dough sticking to the tin, I line the loaf tin first. You can use greaseproof paper for this. However, I prefer to make my own liners from BBQ silicone liners so that I can reuse them.

Here is a video to explain how:
https://www.youtube.com/watch?v=SnVogHJ5kFM

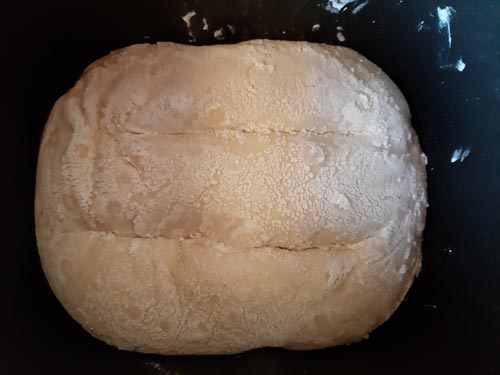
This is a photo of the bread once it has been proved:


13:00 BAKING THE BREAD – 60 MINUTES

Remove the loaf tin from the oven. Heat the oven to 180ºC and then bake the bread for 60 minutes.

Remove the bread from the tin and leave to cool.

Sourdough Bread – A Beginner’s Guide

 My Sourdough Journey

My first attempts at re-invigorating a dried starter failed abysmally and it was clear that it was well and truly dead.

A couple of days into the process, I had added some fermenting blackberries and although there were a couple of promising bubbles, they soon popped and there was no further activity. I decided to try again, this time using fermenting grape juice.

We had picked the grapes to make wine towards the end of September and the must was about 10 days old when I used it. I followed Elly’s everyday low-waste method for making the starter and substituted the grape juice for the unsweetened pineapple juice that she used. This was the process I followed: 

Day 1 morning: In a small bowl, mix together 1/2 cup juice and 1/2 cup strong white flour. Cover with a plate. If the temperature drops below 20ºC, wrap the bowl in a towel.

Day 1 evening: Stir mixture thoroughly with a spatula. Cover.

Day 2 morning: Stir mixture thoroughly with a spatula. Cover.

Day 2 evening: Stir mixture thoroughly with a spatula. Cover.

Day 3 morning: Start the feeding process: In a new bowl, mix
together 3 tablespoons flour, 2 tablespoons water and 3 tablespoons
of the starter. Stir well and then cover with a plate.

Day 3 evening: Repeat feeding process.

Continue feeding starter twice a day until Day 14

By this time, the starter should be quite bubbly and doubling in size by feeding time. It should be ready to use by Day 12 – Day 14.

On Day 14, I attempted my first loaf of bread using Teresa Greenway‘s Sourdough Test loaf method.

As I was still feeding my starter, it wasn’t necessary to take it out of the fridge and reanimate it from hibernation.

DAY 1:
Take the starter out of the fridge at around 19:00 two days before you will be baking bread. Transfer the starter to a bowl and feed with equal amounts of white flour and water. Transfer 50g to a small jar and put this back in the fridge. Leave the rest of the starter on the counter until the next day.

DAY 2:
Start making the bread at around 12:00

The ingredients for the bread are as follows:

  • 100g sourdough starter
  • 330g warm water (80ºF)
  • 20g boiling water mixed with 10g salt
  • 500g bread flour

For the flour, I like to mix 350g white flour and 150g brown flour.

Put the water into a large bowl and add the starter, stirring with a whisk to break up the starter and mix thoroughly.

Cover with a plate, wrap in a towel and leave for 30 minutes.

Add the water and salt and mix thoroughly with your hands.

Leave for 60 minutes

You are now going to do 4 stretch and folds every hour, covering the bowl with the plate and towel after each one.

The stretch and fold process: by stretching and folding the dough, you are working and stretching the gluten strands in the dough. You stretch and fold each of the sides, then turn the dough over and repeat on the other side.

You are then going to do 4 coil folds every half hour, again covering the bowl with the plate and towel after each one.

Leave for 30 minutes.

Pre-shape the dough into a ball on the counter, pulling it from the bottom towards you to increase the tension on the surface.

Let the dough relax for 15-20 minutes.

Use the same technique to shape the ball of dough.

Put the ball into the breadmaker tin. Cover and leave in a cool place overnight.

Follow the following instructions for using a banneton:

Lay a tea towel over the top of a colander or banneton and dust the surface with cornflour.

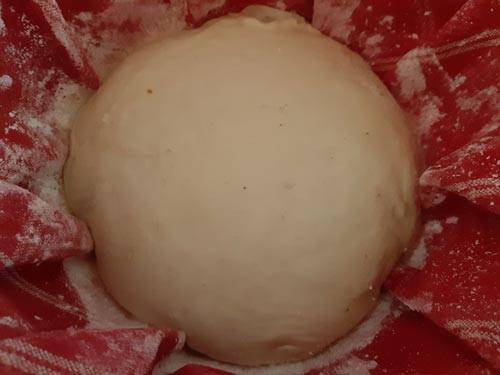
Turn the ball upside down and drop it into the colander. Dust the top with cornflour and then cover with a plastic bag. Place in the fridge overnight.

In the morning, get the dough out of the fridge and leave for 1.5 – 2 hours to come back up to room temperature.

Turn over and dust off any excess flour.


Score the top with a sharp blade. The idea of scoring is let any gases escape and ideally the cut should be about 1/2 deep.

If you want a soft-crust loaf, spray the top with water.

Bake.

Leave to cool for 30 minutes or so and then turn out onto a baking rack.