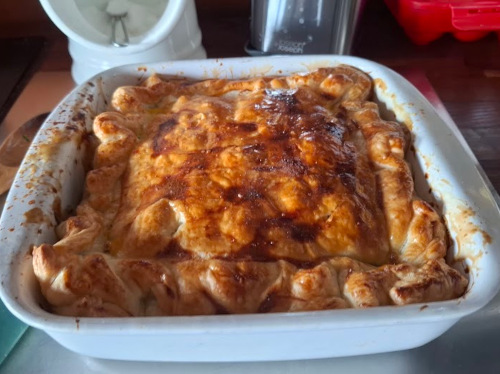
Chicken, Bacon & Mushroom Pie
This classic chicken and mushroom pie is the ultimate comfort food, featuring a rich, velvety sauce and a crisp, golden lid of flaky pastry. By using shop-bought pastry, this dish becomes an impressively quick option for a mid-week treat or a relaxed weekend dinner. The addition of smoky bacon and a splash of white wine creates a deep, savory base that perfectly complements the earthy mushrooms and tender chicken. I find that using chicken thighs rather than breast meat ensures the filling stays succulent during the baking process. It is a hearty, warming staple that looks beautiful when brought to the table straight from the oven, with the pastry puffed to perfection.
Chicken, Bacon & Mushroom Pie
Servings: 4
Total time: 55m
INGREDIENTS
- 1 pack (320g) shop-bought flaky or puff pastry
- 500g chicken thighs (diced)
- 150g smoked streaky bacon (chopped)
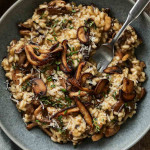
- 250g button mushrooms (sliced)
- 2 stalks celery (finely diced)
- 1 onion (finely chopped)
- 150ml dry white wine
- 300ml chicken stock
- 100ml double cream
- 2 tbsp plain flour
- 1 tbsp butter
- 1 tsp dried thyme
- 1 egg (beaten, for glaze)
- 1 pinch salt and black pepper (to taste)
METHOD
- Heat a splash of oil in a large pan over medium-high heat. Brown the chicken pieces until golden, then remove and set aside.
- In the same pan, fry the chopped bacon until crisp.
- Add the butter to the pan, then toss in the celery, onion, and mushrooms. Sauté for 6–8 minutes until softened and the mushroom liquid has evaporated.
- Stir in the flour and cook for 1 minute to create a roux.
- Pour in the white wine, scraping the bottom of the pan to release the flavor, then gradually stir in the chicken stock and thyme.
- Return the chicken to the pan and bring to a gentle simmer for 10 minutes until the sauce thickens.
- Stir in the double cream and season generously with black pepper. Pour the mixture into a large pie dish and let it cool slightly.
- Preheat your oven to 200°C (400°F).
- Unroll the flaky pastry and drape it over the pie dish. Trim the edges, press down with a fork to seal, and cut a small slit in the center for steam.
- Brush the top thoroughly with the beaten egg for a golden finish.
- Bake for 25–30 minutes until the pastry is puffed and deep golden brown.
- Serve hot, perhaps with seasonal greens or buttery mashed potatoes.