Baking Sourdough Bread in a Bread Machine

sourdough bread in a bread machine

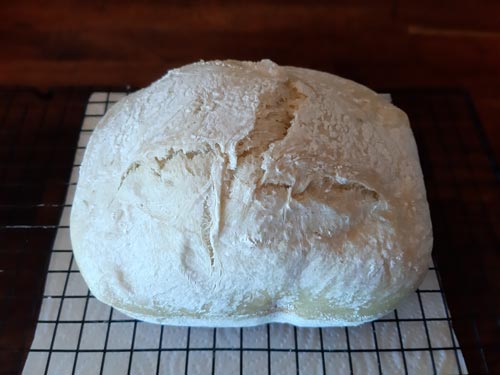
MY SOURDOUGH LEARNING CURVE – UPDATED 25/9/2021

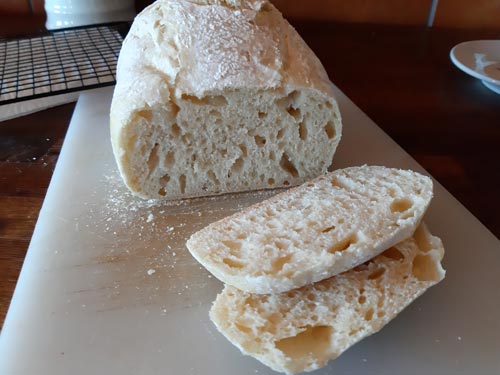
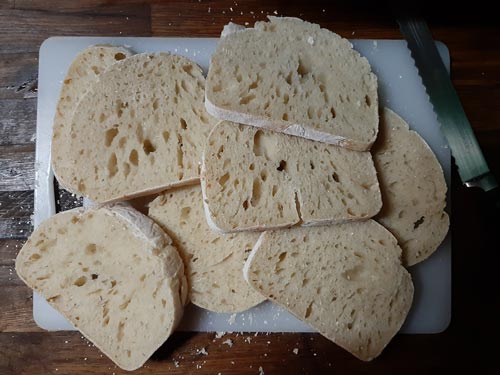
I’ve been making sourdough bread now for about a year now and today I think I’ve made my best loaf yet. Although I had originally been using 350ml water to 500g of flour, I’ve recently decreased the amount of water to 320ml and this seems to work better and the texture of the bread is not so gummy. The original proportions might work better in a conventional oven where there might be more evaporation, but I tend to bake the bread in a bread machine and these proportions seem to work better.


PREPARATION

The day before I am going to bake the bread, I take the sourdough starter out of the fridge at about 17:00 and leave it for a couple of hours to warm up.
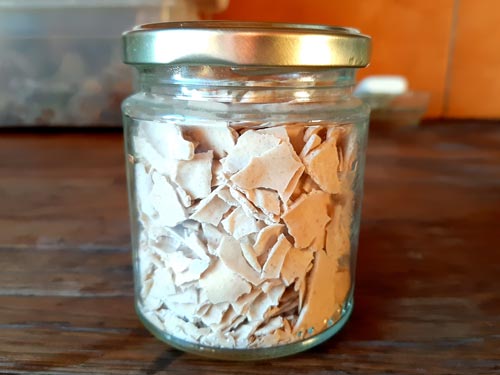
I don’t want to have to throw any of the starter away and so I save the smallest amount possible to bake the next loaf. At the moment, I am saving back 60g.

I use rye flour (centeno) to feed the starter and add 60g flour and 60g of water to the starter. I transfer 60g to a new jar and put this back in the fridge. I then add another 15g flour and 15g water to the remaining starter and mix well. This is the starter for the next loaf and it should weigh approximately 150g. I leave this out on the worktop, wrapping it in a towel in the winter.


AUTOLYSING THE DOUGH

I have recently been experimenting with autolysing the flour overnight before mixing with the starter and this seems to work really well. Autolysing is basically mixing the flour and water together and leaving it for a number of hours for the gluten bonds to form. You generally leave white flour for around an hour and brown flour for about 4 hours.

At about 21:00, I weigh out 250g strong white flour, 250g brown flour, stir in 320ml water and gently knead the mix to bring in all the ingredients. I then cover the bowl with a plate and leave overnight.


ADDING THE STARTER

The next morning, I test the dough to see if it can make a window pane. I then sprinkle in 12g salt and 320ml water, mix well and leave for 60 minutes.
After 60 minutes, I stretch and fold the dough gently about 8 times and coil fold the dough about 4 times.
I do another 4 series of stretch and folds and coil folds every 30 minutes.
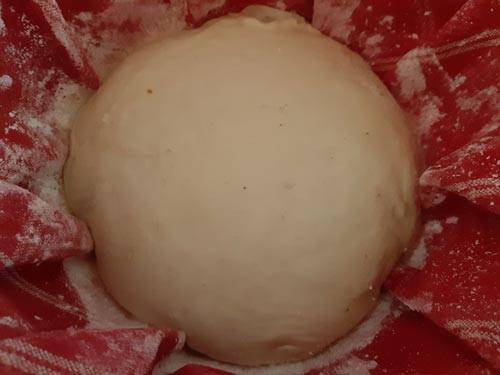
I then shape the dough into a ball, creating surface tension by pulling over and towards me a couple of times, turning the bowl as I go.


BAKING THE BREAD

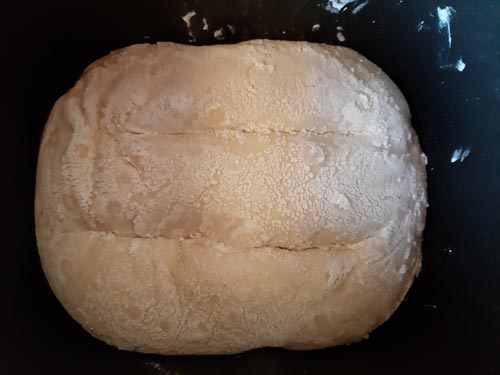
I transfer the ball of dough into the breadmaker. I select the yoghurt cycle on the menu and time the breadmaker for 30 minutes.
After 30 minutes, I stop the machine and choose the bake cycle. On my machine, this takes 60 minutes.

Cooking and Baking in a Breadmaker

bake brownies breadmaker

USING THE OVEN

Here at the cortijo, we generally don’t often use the wood-fired bread oven unless we are planning to cook a number of different dishes on the same day. These might include a typical roast dinner or pizzas, bread and possibly cake, then it makes it worthwhile heating up the wood-fired bread oven for several hours.  I’ve recently been experimenting with baking cakes and cooking things in the breadmaker. I normally make sourdough if it is sunny and it means we can cook it using purely solar energy. I use the BAKE program which is No. 12 on our Princess breadmaker and it takes 60 minutes.
 

COOKING JACKET POTATOES

My first experiment was jacket potatoes. I chose 2 medium-sized potatoes, pricked them with a fork and wrapped them in foil. I took the paddle out of the bread tin and placed the potatoes on either side of the spindle. At the end of the cooking time, I opened up the parcels and cut each potato in half. I pricked the surface with a fork and smeared over some butter and seasoned with salt and pepper. I put a couple of slices of cheddar cheese on one side of each potato and then wrapper them up again and put them back in the breadmaker. There was still a lot of residual heat left from cooking the potatoes and so by leaving them for another 30-40 minutes, they could finish cooking and the cheese could melt.
 

BAKING A CAKE

My second experiment was to bake some brownies and this is the recipe I used. I didn’t want to use the pan that came with the breadmaker so bought an additional one. I measured the machine and reckoned that if I bought one for a maximum width of 18cm I would be OK and chose a 7″ or 17.8cm round PME cake tin. As it turned out, although that was the size of the base and sides sloped gradually outwards and the final edge diameter was 19.6cm. Luckily it was possible to squeeze and force the tin slightly to get it in.

breadmaker"cakeI didn’t want it to sit too near the base and the heating element, so put an upturned ramekin on the turning spindle.

Here are some links to recipes that I have tried in the breadmaker.

RECIPE 1: Brownies


Sourdough Bread – A Beginner’s Guide

 My Sourdough Journey

My first attempts at re-invigorating a dried starter failed abysmally and it was clear that it was well and truly dead.

A couple of days into the process, I had added some fermenting blackberries and although there were a couple of promising bubbles, they soon popped and there was no further activity. I decided to try again, this time using fermenting grape juice.

We had picked the grapes to make wine towards the end of September and the must was about 10 days old when I used it. I followed Elly’s everyday low-waste method for making the starter and substituted the grape juice for the unsweetened pineapple juice that she used. This was the process I followed: 

Day 1 morning: In a small bowl, mix together 1/2 cup juice and 1/2 cup strong white flour. Cover with a plate. If the temperature drops below 20ºC, wrap the bowl in a towel.

Day 1 evening: Stir mixture thoroughly with a spatula. Cover.

Day 2 morning: Stir mixture thoroughly with a spatula. Cover.

Day 2 evening: Stir mixture thoroughly with a spatula. Cover.

Day 3 morning: Start the feeding process: In a new bowl, mix
together 3 tablespoons flour, 2 tablespoons water and 3 tablespoons
of the starter. Stir well and then cover with a plate.

Day 3 evening: Repeat feeding process.

Continue feeding starter twice a day until Day 14

By this time, the starter should be quite bubbly and doubling in size by feeding time. It should be ready to use by Day 12 – Day 14.

On Day 14, I attempted my first loaf of bread using Teresa Greenway‘s Sourdough Test loaf method.

As I was still feeding my starter, it wasn’t necessary to take it out of the fridge and reanimate it from hibernation.

DAY 1:
Take the starter out of the fridge at around 19:00 two days before you will be baking bread. Transfer the starter to a bowl and feed with equal amounts of white flour and water. Transfer 50g to a small jar and put this back in the fridge. Leave the rest of the starter on the counter until the next day.

DAY 2:
Start making the bread at around 12:00

The ingredients for the bread are as follows:

  • 100g sourdough starter
  • 330g warm water (80ºF)
  • 20g boiling water mixed with 10g salt
  • 500g bread flour

For the flour, I like to mix 350g white flour and 150g brown flour.

Put the water into a large bowl and add the starter, stirring with a whisk to break up the starter and mix thoroughly.

Cover with a plate, wrap in a towel and leave for 30 minutes.

Add the water and salt and mix thoroughly with your hands.

Leave for 60 minutes

You are now going to do 4 stretch and folds every hour, covering the bowl with the plate and towel after each one.

The stretch and fold process: by stretching and folding the dough, you are working and stretching the gluten strands in the dough. You stretch and fold each of the sides, then turn the dough over and repeat on the other side.

You are then going to do 4 coil folds every half hour, again covering the bowl with the plate and towel after each one.

Leave for 30 minutes.

Pre-shape the dough into a ball on the counter, pulling it from the bottom towards you to increase the tension on the surface.

Let the dough relax for 15-20 minutes.

Use the same technique to shape the ball of dough.

Put the ball into the breadmaker tin. Cover and leave in a cool place overnight.

Follow the following instructions for using a banneton:

Lay a tea towel over the top of a colander or banneton and dust the surface with cornflour.

Turn the ball upside down and drop it into the colander. Dust the top with cornflour and then cover with a plastic bag. Place in the fridge overnight.

In the morning, get the dough out of the fridge and leave for 1.5 – 2 hours to come back up to room temperature.

Turn over and dust off any excess flour.


Score the top with a sharp blade. The idea of scoring is let any gases escape and ideally the cut should be about 1/2 deep.

If you want a soft-crust loaf, spray the top with water.

Bake.

Leave to cool for 30 minutes or so and then turn out onto a baking rack.